Showing posts with label DIY. Show all posts

Thursday, September 29, 2011

DIY onesie upcycle

My little Hinkley was so much smaller than my first that I wasn't prepared with cute little outfits for her that were that small! I had one to bring her home in but that was about it. Even jammies she only had one thing that didn't drown her. For some reason it was so important to me to have her in cute things that fit and when I couldn't find any little outfits to buy I decided to make some...Onesies were my best bet since my kids are long and skinny and I had some hand-me-downs from my cousin so up-cyling was the perfect solution! 


For the owl I took random fabric scraps and just cut them until I liked the shape, used fabric glue to attach on roughly then my sweet mommy helped me stitch around the edges to hold and define!!! And you can do fabric or googly eyes whatever you have! Easy peasy.

The ruffle onesie was even easier! I cut ruffles off of a pair of pants I wasn't going to put her in and started attaching with fabric glue! Just make sure you have something in-between the front and back of the onesie so you don't leak and glue them together! Then to secure for sure for sure just add a few stitches but your glue should work just fine!  FUN HUH!? Free, and they have ended up being my favorite things for her!


Monday, September 26, 2011

CHALK!!!


Today I have been looking for fun summery things to do with my babies because I know the nice weather will be gone soon and I will be missing it! And now is a better time than ever because it is warm but not scorching! YAY! So this is what I will be doing in days to come: 

  • Playing with some classic sidewalk chalk. Maybe drawing a target somewhere and throwing sponges at it til it disappears...so fun especially for my little man that LOVES throwing anything!

  • I will make sidewalk chalk paint...and let my kids make a beautiful glorious mess! Thank you ohdeedoh!
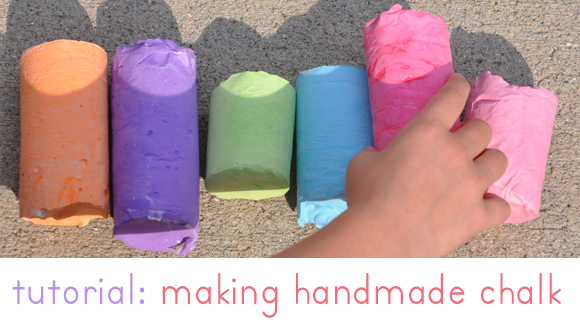
  • And I WILL be making HUGE homemade sidewalk chalk using this tutorial from oh my handmade! Seriously people are so cute and creative...thanks for being that way so I can have fun!

I love things like this because they are so simple and can make such fun times and good memories for you and your babies!!! So chalk it up!


Wednesday, September 21, 2011

Up-cycled Key Holder...

I call this a 'key holder' for lack of better name...if you have one let me know...but remember my chair? I had extra fabric and this ugly thing as well as the key word hanger and thought hey why not? I'm hoping it will keep me from loosing my keys so much. So do do something like this you will need:

  • A framed mirror and/or cork board 
  • Cute Fabric
  • twine(I used this around my edges because I couldn't take the cork board out to wrap fabric around)
  • And last but not least hooks, I probably would have used some fun drawer pulls even if I didn't already have the 'keys' thing
  • paint 
  • stain 
  • wood glue
  • hot glue

Here is a photo representation of my efforts

Before...nothing exciting 

Rough it up, paint, stain, let dry

Find your fabric for cork part


I traced size of fabric, cut, hot glued then stapled for good measure

looks like this at this stage

To cover staples and uneven edges I added twine using hot glue


When you like how it looks, cut and push in tight, secure with hot glue


I used wood glue cause I figured it would hold better

Whala! Better right? Now it matches my chair.


So functional!